
Side Dishes
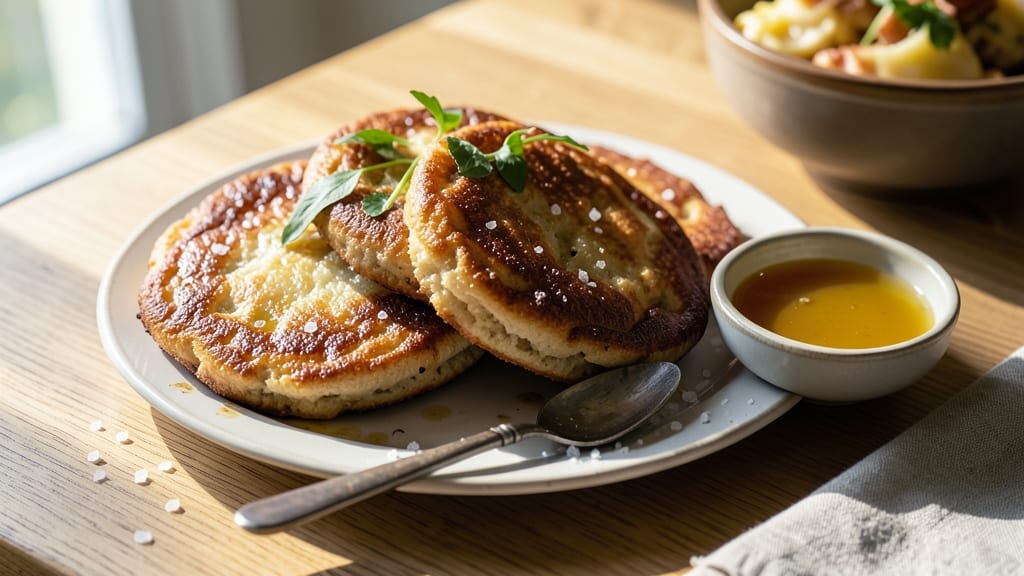
This Alaska Native fry bread recipe brings the warmth of Indigenous traditions to your kitchen with its perfect balance of crispy edges and soft centers. 🔥 The dough's simple ingredients—flour, baking powder, salt, shortening, and water—create a versatile canvas for both sweet and savory toppings, reflecting the resourcefulness of Alaska Native communities.
What makes this recipe special is its connection to history, originally crafted as a survival food during forced relocations.
The magic happens when you fry the dough in hot oil until golden brown, achieving that signature crispy texture while keeping the inside tender. This method delivers restaurant-quality results with minimal effort, perfect for feeding a crowd or enjoying as a comforting side dish.
The bread's versatility makes it ideal for breakfast, dinner, or even dessert, depending on your topping choices.
By the time you're done, you'll have a batch of fry bread that's crispy on the outside and pillowy inside, with a smoky aroma that fills your kitchen.
The dough's simplicity means you can customize it with your favorite toppings—powdered sugar, jam, honey, or even savory options like bacon and cheese. This recipe is more than just food; it's a celebration of culture and tradition.
Serve warm with your favorite toppings and enjoy the satisfaction of creating a dish with deep roots. Whether you're cooking for family or sharing with friends, this fry bread recipe brings warmth and history to your table. Let's get started on making this traditional dish in your own kitchen!
Ingredients for alaska native fry bread
Simple dough, deep tradition—just 7 core ingredients for history-infused fry bread.
| Ingredient | Amount | Notes |
|---|---|---|
| All-Purpose Flour 🌾 | 4 cups | Sifted for light texture |
| Baking Powder 🍞 | 1 tbsp | Ensures proper rise |
| Salt 🧂 | 1 ½ tsp | Kosher or sea salt |
| Vegetable Shortening 🧈 | ½ cup | Or lard for authentic flavor |
| Water 💧 | 1 ½ cups | Lukewarm for best results |
| Vegetable Oil 🫒 | 4 cups | For frying, high smoke point |
| Powdered Sugar 🍚 | 1 cup | Optional topping (sweet) |
| Honey 🍯 | ½ cup | Optional topping (sweet) |
| Jam 🍓 | 1 cup | Optional topping (sweet) |
| Cooking Spray 💦 | 1 can | For greasing bowl |
| Bacon 🥓 | 1 lb | Optional topping (savory) |
| Shredded Cheese 🧀 | 2 cups | Optional topping (savory) |
The flour is key here—King Arthur or Gold Medal work best for that tender crumb. Bulk bins at WinCo or Costco are great for saving money. Baking powder matters too: double-acting ensures proper rise. Shortening gives that signature crispy texture, but lard (rendered pork fat) is traditional and adds a smoky depth. Use vegetable shortening if you want a neutral flavor. The water should be lukewarm—not hot, not cold—so it activates the yeast in the baking powder without cooking the flour.
No vegetable shortening? Butter works in a pinch (but expect a slightly richer flavor), or coconut oil for a dairy-free option. Short on oil? Deep fryer baskets let you reuse oil more efficiently. For toppings, powdered sugar is a must for that classic sweet version, but honey or jam add extra richness. Savory options like bacon or cheese turn this into a hearty breakfast or snack. Pro tip: Preheat your oil to 375°F—too hot and it burns, too cool and it soaks up oil instead of crisping.
Leftovers? Store in an airtight container for up to 3 days—reheat in a toaster or oven until crispy again. Freeze extras by wrapping individually in foil for up to 3 months. The dough itself keeps in the fridge for 24 hours if you want to prep ahead. Double the batch—this bread disappears fast, especially when topped with honey or jam. Serve warm for that perfect pillowy-crispy contrast.
Why You'll Love This Recipe
- Here’s what sold me: that first bite where the outside shatters into flaky layers, but the inside stays pillowy soft. The shortening keeps it rich without needing butter, and the baking powder gives it that airy lift that makes it ridiculously satisfying.
- Five-Ingredient Magic: Honestly, I’ve made this so many times I could do it blindfolded—just flour, baking powder, salt, shortening, and water. That’s it. No fancy ratios to memorize, no weird substitutions, just mix, fry, and boom—golden perfection every time.
- Crispy-Creamy Bliss: Here’s what sold me: that first bite where the outside shatters into flaky layers, but the inside stays pillowy soft. The shortening keeps it rich without needing butter, and the baking powder gives it that airy lift that makes it ridiculously satisfying.
- Party or Pantry: Between us, this is my go-to for game day snacks, potlucks, or even a lazy Sunday breakfast. Toss it in a bag for a quick lunch, or serve it warm with honey and jam—my kids fight over it, and that’s the real test.
Step-by-step instructions for Alaska Native fry bread
Let's make this iconic Native dish with crispy edges and a soft center—just like campfire perfection.
👨🍳 Step 1: Mix the Dough for Perfect Texture
In a large bowl, combine the 4 cups all-purpose flour, 1 tbsp baking powder, and 1.5 tsp salt. Whisk gently to blend the dry ingredients—this ensures even distribution of leavening for that signature rise.
Next, cut in the 0.5 cup vegetable shortening using a pastry cutter or two forks until the mixture resembles coarse crumbs with pea-sized pieces of fat. This step is crucial—it creates pockets for steam to develop during frying, giving you that signature pillowy texture. If using lard, it'll add an authentic campfire flavor, but shortening works just fine.
👨🍳 Step 2: Add Lukewarm Water Gradually
Slowly pour in the 1.5 cups lukewarm water while stirring with a wooden spoon. Mix just until the dough comes together—it should be slightly sticky but not wet. Overmixing develops gluten and makes the bread tough.
Here's the thing—I like to let the dough rest for 5 minutes after mixing. This allows the flour to fully hydrate and the gluten to relax slightly. You'll notice the dough will feel smoother and more cohesive after this short rest period.
🔥 Step 3: Shape and Fry to Golden Perfection
Heat 2 cups vegetable oil in a large skillet over medium-high heat until it reaches 350°F. You'll know it's ready when a wooden chopstick inserted into the oil bubbles steadily around the edges.
Using a greased spoon, drop 2-tablespoon portions of dough into the hot oil. Flatten slightly with the spoon—this helps create that classic round shape. Fry for 2-3 minutes per side until golden brown with crispy edges. Don't overcrowd the pan or the oil temperature will drop, making the bread greasy instead of crispy.
🍽️ Step 4: Top and Serve Warm
Transfer the fried bread to a paper towel-lined plate to drain excess oil. While still warm, brush with melted butter if desired, then sprinkle with any combination of toppings: 1 cup powdered sugar, 0.5 cup honey, 1 cup jam, 1 lb cooked bacon crumbles, or 2 cups shredded cheese. The contrast of warm, crispy bread with sweet or savory toppings is what makes this dish special.
Serve immediately while the bread is at its warmest and crispest. Each bite should deliver that perfect balance of a crispy exterior with a soft, pillowy center. Real talk: the first piece out of the fryer is always the best—don't skip the warm serving step!
Pro Tips For Making Alaska Native Fry Bread
- Heat the Oil Right: Fry bread in oil that’s hot enough to sizzle but not smoke—around 375°F (190°C). I learned this the hard way: too cool, and you get greasy, dense dough; too hot, and it burns before puffing. A wooden chopstick test works: drop a bit in, and if bubbles form around it within 3 seconds, you’re golden.
- Mix Until Just Combined: Overmixing the dough ruins the texture—it turns tough instead of tender. After adding water, stop as soon as the dough clumps together. My grandmother used to say, “The dough should look like shaggy dog hair,” and she wasn’t wrong. A few lumps are fine; they’ll smooth out when fried.
- Use Shortening, Not Butter: Butter burns too fast and adds unwanted flavor. Vegetable shortening stays stable at high heat and gives that classic crispy, flaky texture. I was skeptical until I tried it—now I won’t go back. If you’re out of shortening, lard works too, but keep it cold when mixing.
- Rest the Dough 10 Minutes: Let the dough sit covered for 10 minutes after mixing. This relaxes the gluten, so it puffs up properly instead of spreading flat. I used to skip this, and my fry bread came out more like a pancake. Sounds weird, but it works—give it a break.
Best sauces and condiments for this recipe
Sweet Toppings
For that classic Alaska Native fry bread experience, I love dusting warm bread with 1 cup powdered sugar—it creates a sweet, snowy finish that melts slightly into the crispy edges. 🍚 A drizzle of ½ cup honey adds rich, floral notes that pair beautifully with the bread's pillowy center.
For something fruity, 1 cup jam (I recommend strawberry or raspberry) provides a tangy contrast that brightens every bite.
Pro tip: Warm the jam slightly before serving—this makes it easier to spread and enhances its flavor. If you're feeling fancy, sprinkle with toasted cinnamon sugar or a pinch of cardamom for an aromatic twist.
The key is to add toppings immediately after frying while the bread is still warm enough to soak up the sweetness.
Savory Toppings
Transform your fry bread into a hearty breakfast or snack with 1 lb cooked bacon crumbles—the smoky, salty flavor cuts through the richness of the bread beautifully.
I like to crisp the bacon first, then sprinkle it over the warm bread for that perfect crunch. 2 cups shredded cheese (cheddar or Monterey Jack work great) melts slightly when added right out of the fryer, creating a gooey, cheesy center.
For a vegetarian option, try sautéed mushrooms with garlic or spicy black beans mixed with a dollop of sour cream. The contrast of warm, crispy bread with bold, savory toppings makes this dish feel like a full meal.
Don't forget a sprinkle of fresh parsley or chives for a pop of color and freshness.
Dipping Sauces
A simple honey butter dip—mix ½ cup melted butter with ¼ cup honey and a pinch of sea salt—elevates every bite. The sweetness of the honey balances the richness of the butter, while the salt enhances the bread's flavor.
For something tangy, whip up a fruit compote by simmering 1 cup mixed berries with 1 tbsp sugar and 1 tsp lemon juice until thickened.
If you prefer something creamy, a sour cream and chive dip (mix ½ cup sour cream with 1 tbsp chopped chives and a pinch of black pepper) adds a cool contrast to the warm bread.
These dips are perfect for sharing—just place small bowls on the table and let everyone customize their fry bread experience.
Traditional Pairings
In Alaska Native communities, fry bread is often served with baked beans or fried chicken for a hearty meal. The crispy bread soaks up the juices from the chicken, while the beans add a smoky, earthy depth.
For a lighter option, pair it with fresh fruit salad—the sweetness of the fruit complements the bread's richness without overpowering it.
Don't underestimate the power of a simple cup of strong black coffee or hot tea to balance the flavors. The warmth of the drink enhances the bread's crispy texture, making it feel like a cozy, comforting meal.
If you're serving this at a gathering, offer a variety of toppings and dips so everyone can create their perfect bite.
Nutrition facts
Frequently asked questions
Can I make Alaska Native fry bread without shortening?
Yes! Use ½ cup butter or ½ cup lard instead—both work well. Lard gives that authentic campfire flavor, while butter adds richness. Just remember, butter has a lower smoke point, so keep your oil at 350°F to avoid burning. For a dairy-free option, coconut oil works too, though it may alter the texture slightly.
Why is my fry bread turning out greasy instead of crispy? Greasy bread usually means your oil isn't hot enough or you're overcrowding the pan. Keep oil at 350°F and fry in batches—only 2-3 pieces at a time. Also,
How do I store leftover fry bread?
Store in an airtight container at room temperature for 2-3 days, or freeze for up to 3 months. To reheat, place in a 350°F oven for 5-7 minutes or until crispy again. For extra crunch, pop individual pieces in the toaster for 30-60 seconds. Pro tip: Wrap cooled bread in foil before freezing to maintain crispiness.
What's the best way to make this recipe gluten-free?
Replace the all-purpose flour with a 1:1 gluten-free baking flour blend (like Bob's Red Mill). You may need to add ½ tsp xanthan gum for structure. Also, reduce water by 1-2 tbsp since gluten-free flours absorb differently. Fry at 325°F instead of 350°F—gluten-free dough needs gentler heat to crisp properly.
Can I use this dough for other recipes?
This dough works great for fried dumplings or savory pastries. For dumplings, drop smaller portions into oil and fry until golden. For pastries, roll out the dough and cut into shapes before frying. You can also bake it at 375°F for 10-12 minutes for a lighter version—just brush with melted butter for extra flavor.