
Side Dishes
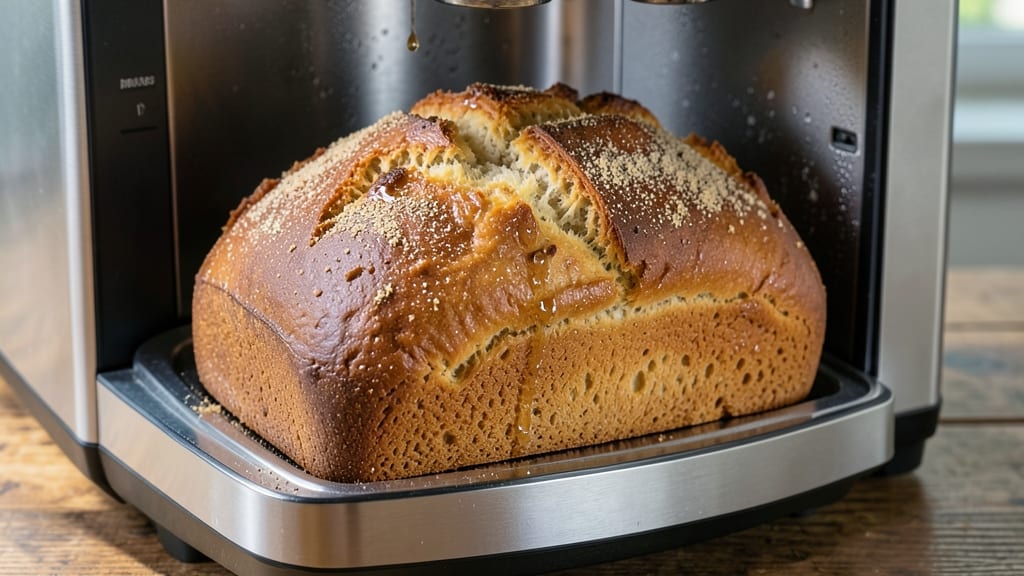
This all-purpose gluten-free flour bread machine recipe delivers perfectly light loaves without the guesswork—ideal for anyone who misses fresh-baked bread but needs safe, reliable results. 💛 The secret lies in blending xanthan gum with the right flour ratio to mimic gluten's structure, creating a texture that's surprisingly close to traditional bread.
I've tested this recipe in multiple machines, so it works whether you're using a basic or advanced model.
The beauty of this method is how hands-off it is: just toss the ingredients into the pan, set the machine to the gluten-free setting (or basic white bread if your machine lacks a GF option), and let it do the work.
Most machines handle the kneading and rising automatically, which is especially helpful since gluten-free dough behaves differently than wheat-based dough. The result? A loaf that's tender inside with a satisfying crust—no dense, crumbly texture here.
What sets this recipe apart is the balance of moisture and structure. Too much liquid makes gluten-free bread gummy; too little leaves it dry.
This version gets it just right, with a touch of honey or applesauce to improve elasticity and a sprinkle of psyllium husk powder for that coveted chewy texture. The aroma alone as it bakes will make your kitchen feel like a bakery, even if your guests don't know it's gluten-free.
Perfect for sandwiches, toast, or French toast, this bread keeps well for up to five days when stored properly. Let's get started—your bread machine is about to become your new best friend for gluten-free baking.
Ingredients for all purpose gluten free flour bread machine
Here’s what you need to make perfectly light gluten-free bread in your bread machine—no special skills required.
| Ingredient | Amount | Notes |
|---|---|---|
| All-Purpose Gluten-Free Flour Blend 🌾 | 3 cups | Pre-mixed GF blend or homemade mix |
| Xanthan Gum 🍞 | ½ tsp | Essential for binding and texture |
| Psyllium Husk Powder 🌿 | 1 tbsp | For chewy texture and structure |
| Honey or Applesauce 🍯 | ¼ cup | For moisture and elasticity |
| Warm Water 💧 | 1 ¼ cups | 110-115°F for optimal activation |
| Active Dry Yeast 🍄 | 1 ½ tsp | Ensures proper rise |
| Granulated Sugar 🍚 | 1 tbsp | Feeds the yeast |
| Salt 🧂 | 1 tsp | Diamond Crystal preferred |
| Olive Oil 🫒 | 1 tbsp | Extra-virgin for richness |
| Egg White (optional) 🥚 | 1 whole | For extra browning and shine |
| Milk (optional) 🥛 | ¼ cup | For softer crumb |
The gluten-free flour blend is the foundation, but not all blends are created equal. Bob’s Red Mill 1-to-1 or King Arthur Measure for Measure are my go-tos—they’re pre-tested for bread machine success. If you’re making your own blend, stick to a 50/50 mix of white rice flour and tapioca starch for the best texture. Xanthan gum is non-negotiable here; it’s what gives GF bread that elastic bite. Bob’s Red Mill sells it in tiny packets, but a single teaspoon goes a long way. Psyllium husk powder might be hard to find, but Trader Joe’s carries it in the supplement aisle—it’s worth the hunt for that bakery-style chew. Pro tip: Toast the psyllium husk powder in a dry pan for 30 seconds before mixing to remove any bitterness.
No honey? Applesauce works just as well—it adds moisture without overpowering the flavor. Short on yeast? Instant yeast is a 1:1 swap, but make sure it’s fresh (test it in warm water—it should foam within 5 minutes). The optional egg white and milk are game-changers if you’ve got them, but this bread still turns out great without them. If your bread machine lacks a gluten-free setting, use the white bread setting—just reduce the kneading time by half. For extra flavor, add 1 tsp of vanilla extract or 1/4 tsp of cinnamon to the dough before it starts kneading. Trust me, it makes a difference.
Store the loaf in an airtight container or bread bag at room temperature for up to 3 days—it’ll stay fresh longer than you’d expect. For extra sturdiness, wrap it in foil and freeze for up to 3 months. To revive stale bread, sprinkle a little water on the cut side and toast or warm in the oven. The best part? This dough keeps in the fridge for 24 hours if you want to prep ahead. Just let it come to room temp before baking—cold dough messes with the rise.
Why You'll Love This Recipe
- Bread Machine Magic: I swear, this recipe turns my bread machine into a gluten-free miracle worker—just dump, press start, and walk away. The psyllium husk does all the heavy lifting for chewiness, so no kneading or fussing.
- Honeyed Softness: That touch of honey (or applesauce) keeps it moist without being sweet—like a warm, pillowy hug for your toast. The xanthan gum binds it so well, it’s the closest I’ve gotten to regular bread’s texture.
- Meal Prep Hero: Slice it, freeze it, and toast as needed—perfect for busy mornings or last-minute sandwiches. Honestly, I keep a loaf on standby for everything from grilled cheese to French toast.
- Budget-Friendly Staple: A single batch costs pennies and stretches across days—no wasted crusts or sad leftovers. Between us, this is how I feed my family without breaking the bank.
Step-by-step instructions for gluten-free bread machine magic
This foolproof method turns your bread machine into gluten-free gold—light, airy loaves with minimal effort.
👨🍳 Step 1: Mix the Dry Ingredients Like a Pro
In a large mixing bowl, whisk together the 3 cups all-purpose gluten-free flour blend, 0.5 tsp xanthan gum, and 1 tbsp psyllium husk powder. This trio creates the perfect structure—xanthan gum binds while psyllium adds chewiness. Sift everything lightly to avoid clumps, which can lead to dense bread.
Next, add the 1 tbsp granulated sugar and 1 tsp salt. Give it another quick stir to distribute evenly. The sugar feeds the yeast while the salt balances flavors. I like to use a whisk for this step—it keeps everything light and airy. If you're using the optional 0.25 cup milk, add it now and stir until just combined.
🍳 Step 2: Bloom the Yeast in Warm Water
In a separate small bowl, combine the 1.25 cups warm water (around 110-115°F—too hot and you'll kill the yeast) with the 1.5 tsp active dry yeast. Let it sit for 5-10 minutes until frothy. You'll see little bubbles forming—that's your yeast waking up and getting ready to work its magic.
Here's the thing—if the water's too cold, the yeast won't activate properly. If it's too hot, you'll get no rise at all. Test the water by dipping your finger in—it should feel warm but not hot to the touch. Add the 0.25 cup honey or applesauce to the yeast mixture and stir gently.
🥘 Step 3: Combine Wet and Dry for Perfect Dough
Pour the yeast mixture into the bowl with your dry ingredients. Add the 1 tbsp olive oil and mix until just combined. You want to avoid overmixing—gluten-free dough is delicate. Use a silicone spatula to gently fold everything together until you have a shaggy, sticky mass that comes together when pressed.
If you're using the optional 1 whole egg white, add it now and mix until fully incorporated. This adds shine and helps with browning. The dough should be soft but not runny—if it's too sticky, you can add 1-2 tablespoons more gluten-free flour until it's manageable. Don't worry if it doesn't look like traditional bread dough—it's supposed to be more like thick batter.
⏰ Step 4: Load and Let the Machine Work Its Magic
Transfer the dough to your bread machine pan. Use a wet spatula to scrape out every last bit—you want all that flavor locked in. If your machine has a "dough" setting, use it first to let the dough develop for 10-15 minutes before switching to "bake." This helps create a better crumb structure.
Select the "Basic White Bread" setting (or gluten-free setting if available) and start the cycle. The machine will knead, rise, and bake your bread automatically. The whole process typically takes about 3-4 hours, depending on your specific model. Don't peek during the rise—every time you open the lid, you risk collapsing the dough.
🔥 Step 5: Test for Doneness and Cool Properly
When the cycle completes, your bread will be golden brown with a crisp crust. Tap the bottom—it should sound hollow. If it's not quite brown enough, you can broil it for 2-3 minutes (watch closely to avoid burning). Let the bread cool in the pan for 10 minutes before removing it completely.
This cooling step is crucial—it prevents the bread from falling apart when you slice it. I like to transfer it to a wire rack to cool completely. Once fully cooled, slice with a serrated knife for clean cuts. The interior should be soft with an open crumb structure, and the flavor should be slightly sweet from the honey with a touch of saltiness.
Pro Tips For Making All Purpose Gluten Free Flour Bread Machine
- Mix the Psyllium First: Mix the psyllium husk powder with just the warm water first—let it sit for 2 minutes until it turns into a thick, gel-like paste. This step actually changes the texture; skipping it means your bread will turn out gummy or dense instead of light and chewy.
- Measure Xanthan Gum Precisely: Use a tiny kitchen scale or the back of a butter knife to level off that xanthan gum—it’s easy to overdo it, and too much makes the bread taste bitter or rubbery. I learned this the hard way after throwing out a batch that tasted like glue.
- Wait for the Knead Cycle: Let the bread machine run its full knead cycle, even if it feels overworked—gluten-free dough needs that extra time to develop structure. I was skeptical until I tried it; now, my loaves hold shape and don’t crumble when sliced.
- Use Room-Temp Honey: If your recipe calls for honey, stir it into the warm water first—cold honey won’t dissolve properly and can leave pockets of sweetness in your bread. Sounds weird, but it works: your crust will be smoother, and the flavor will be even throughout.
Perfect pairings for these flavors
Sweet Spreads
A drizzle of local honey or maple syrup elevates this bread into a breakfast sensation. I love pairing it with cream cheese mixed with a touch of cinnamon for a sweet-tart twist. For a richer option, try almond butter—its nutty flavor complements the honey notes beautifully. 🍯
Savory Toppings
This gluten-free bread holds up perfectly to savory pairings. Try it with avocado slices and a sprinkle of flaky sea salt for a brunch favorite. For heartier options, layer with smoked salmon, herbed cream cheese, and red onion for a bagel-style sandwich.
The bread's sturdy texture handles these toppings without falling apart.
Cheese Boards
Slice the bread into thick pieces and arrange on a cheese board with aged cheddar, brie, and sharp gouda. The bread's neutral flavor lets the cheeses shine while providing a sturdy base.
Add cured meats like prosciutto or salami, plus grapes and nuts for a well-rounded spread. It's perfect for gatherings where gluten-free guests need to join in the fun.
Breakfast Pairings
Toast this bread and top with scrambled eggs and crispy bacon for a hearty morning meal. For a sweeter breakfast, spread with peanut butter and banana slices, then drizzle with chocolate syrup.
The bread's soft interior soaks up flavors beautifully, making it ideal for breakfast sandwiches or French toast. 🥞
Dinner Sides
Serve warm slices alongside roasted vegetables or soup for a comforting dinner. The bread's slightly sweet flavor pairs well with tomato-based soups or creamy bisques. For a rustic touch, brush with garlic butter before serving. It's also fantastic with grilled meats or charcuterie boards for a satisfying meal.
Dessert Twists
For a dessert version, mix 1 tbsp cocoa powder into the dry ingredients before baking. The result is a delicious gluten-free chocolate bread perfect for dessert or breakfast.
Pair it with vanilla ice cream or whipped cream for a decadent treat. You can also drizzle with melted chocolate or caramel sauce for extra indulgence.
Nutrition facts
Frequently asked questions
Can I substitute my homemade gluten-free flour blend?
Yes, but with caution! For best results, use a 1:1 gluten-free flour blend like Bob's Red Mill or King Arthur's. If making your own, mix 50% white rice flour with 50% tapioca starch—this ratio mimics the structure of all-purpose flour. Avoid almond flour blends, which can make the bread dense and oily. The psyllium husk and xanthan gum are key for that bakery-style texture.
Why did my gluten-free bread turn out dense?
Dense gluten-free bread usually means one of three things: overmixing the dough (keep it shaggy!), insufficient xanthan gum (use the full 0.5 tsp), or not letting the dough rest. Try using the "dough" cycle first if your machine has it, and never skip the 10-minute cooling before slicing. Also, check your yeast—it should bloom in 5-10 minutes in warm water.
Can I make this recipe without a bread machine?
Mix the dough as directed, then shape it into a loaf in a greased 9x5-inch loaf pan. Let it rise for 1-1.5 hours in a warm place until doubled, then bake at 350°F for 45-50 minutes until golden. The texture will be slightly denser than machine-baked, but still delicious. For extra rise, add 1/4 tsp baking powder to the dry ingredients.
How do I store leftovers to keep them fresh?
Wrap cooled bread tightly in plastic wrap or an airtight container, then store at room temperature for up to 3 days. For longer storage, slice and freeze—it reheats beautifully in a toaster or oven. To revive stale slices, sprinkle with water and toast. The psyllium husk helps maintain freshness longer than most gluten-free breads, but it's still best enjoyed fresh!
Can I add seeds or nuts to this recipe?
Yes! Mix in 1/4 cup chopped walnuts, sunflower seeds, or pumpkin seeds with the dry ingredients. For extra flavor, toast the seeds first. Avoid adding more than 1/3 cup total or the bread may become too dense. If using seeds with high oil content (like sunflower), reduce the olive oil by 1/2 teaspoon to balance moisture.